Get Started with CML on GitHub
Here, we'll walk through a tutorial to start using CML with GitHub Actions.
-
Fork our example project repository.
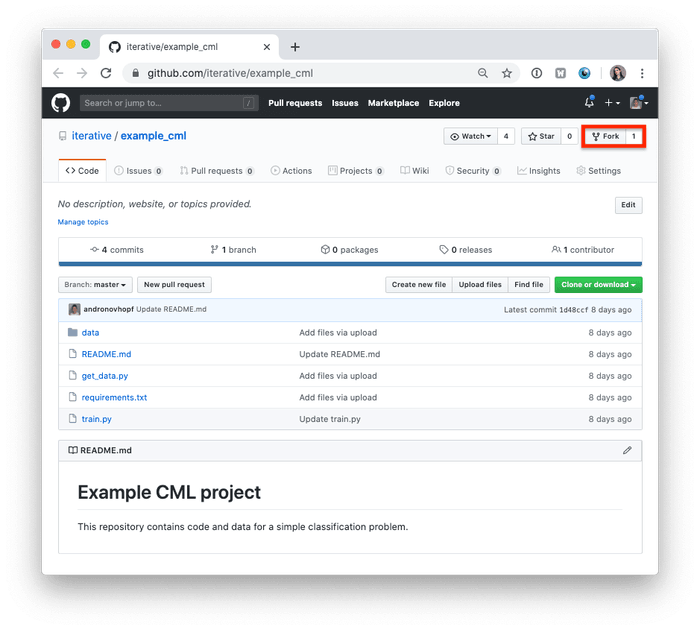
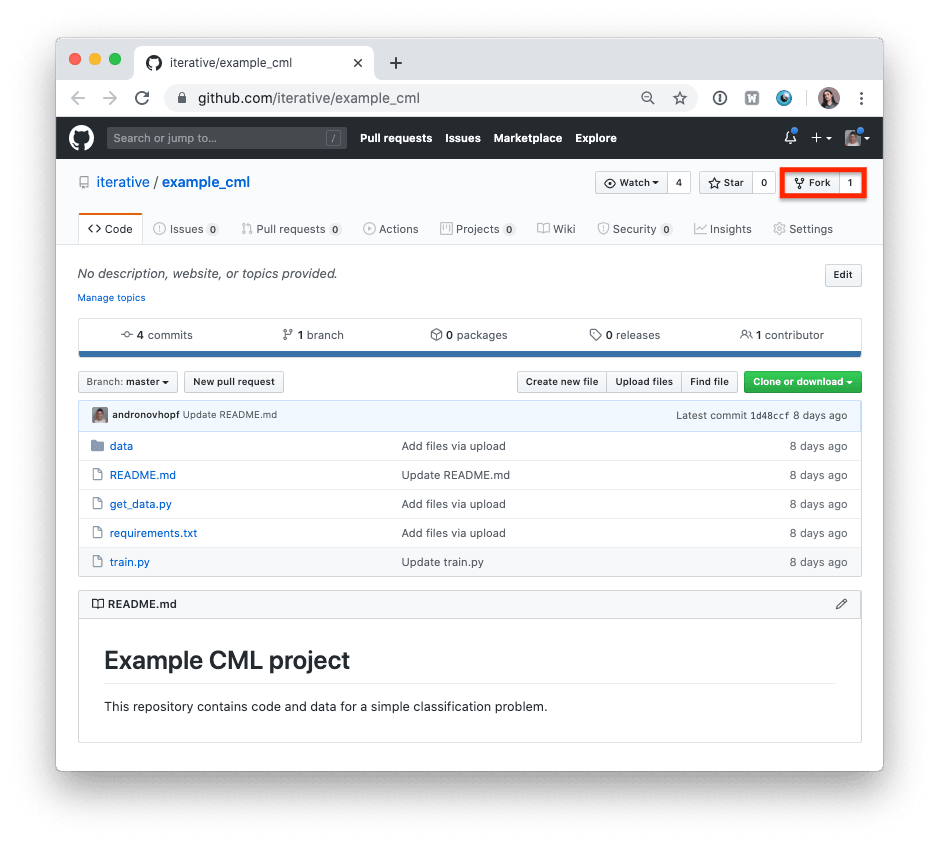
The following steps can all be done in the GitHub browser interface. However, to follow along the commands, we recommend cloning your fork to your local workstation:
$ git clone https://github.com/<your-username>/example_cml
$ cd example_cml-
To create a CML workflow, copy the following into a new file at
.github/workflows/cml.yaml:name: CML on: [push] jobs: train-and-report: runs-on: ubuntu-latest container: docker://ghcr.io/iterative/cml:0-dvc2-base1 steps: - uses: actions/checkout@v3 - name: Train model env: REPO_TOKEN: ${{ secrets.GITHUB_TOKEN }} run: | pip install -r requirements.txt python train.py # generate plot.png # Create CML report cat metrics.txt >> report.md echo '' >> report.md cml comment create report.md -
In your text editor, open
train.pyand modify line 15 todepth = 5. -
Commit and push the changes:
$ git checkout -b experiment $ git add . && git commit -m "modify forest depth" $ git push origin experiment -
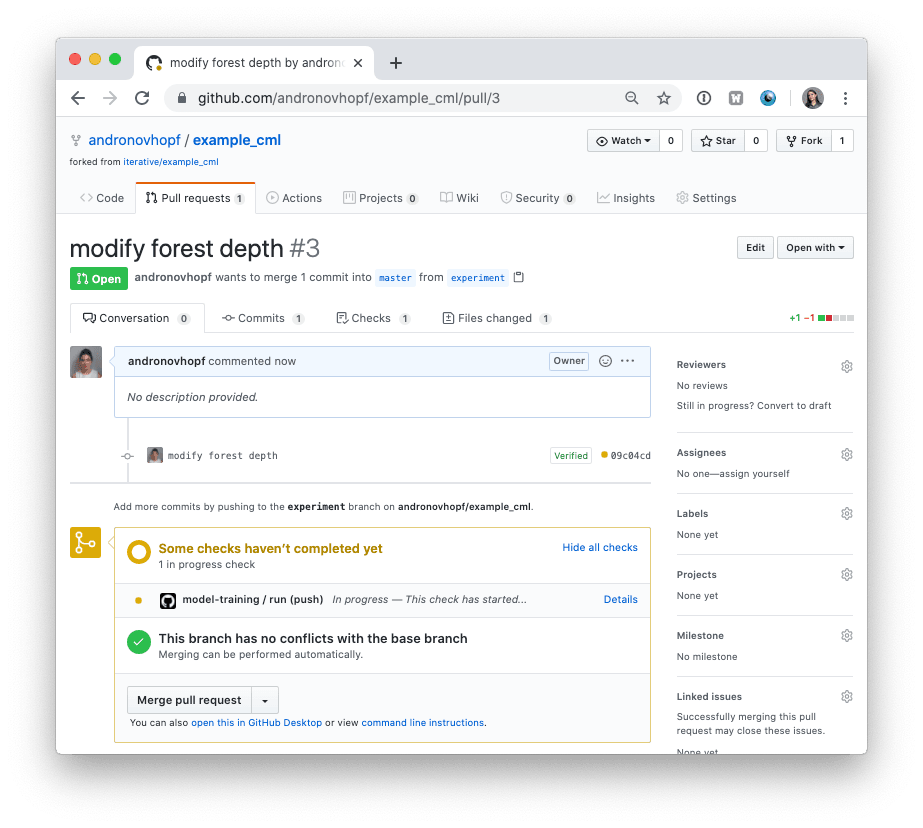
In GitHub, create a Pull Request to compare the
experimentbranch tomaster.Ensure the target is your fork (under your username).
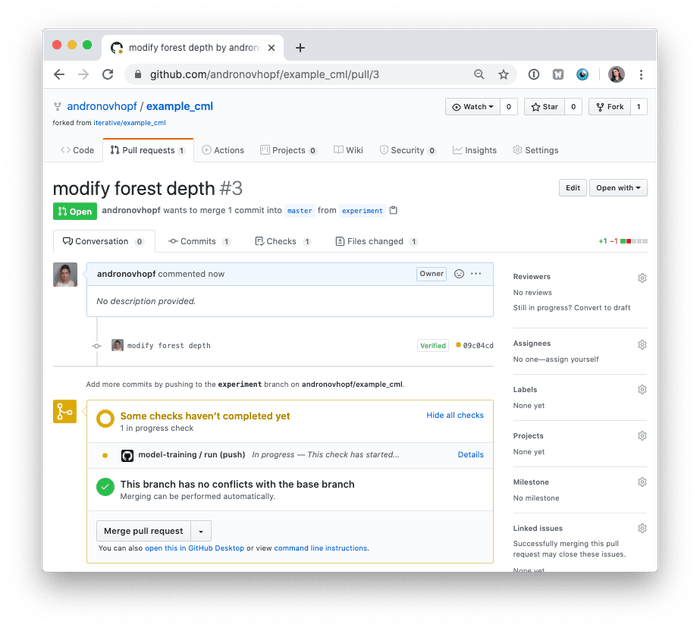
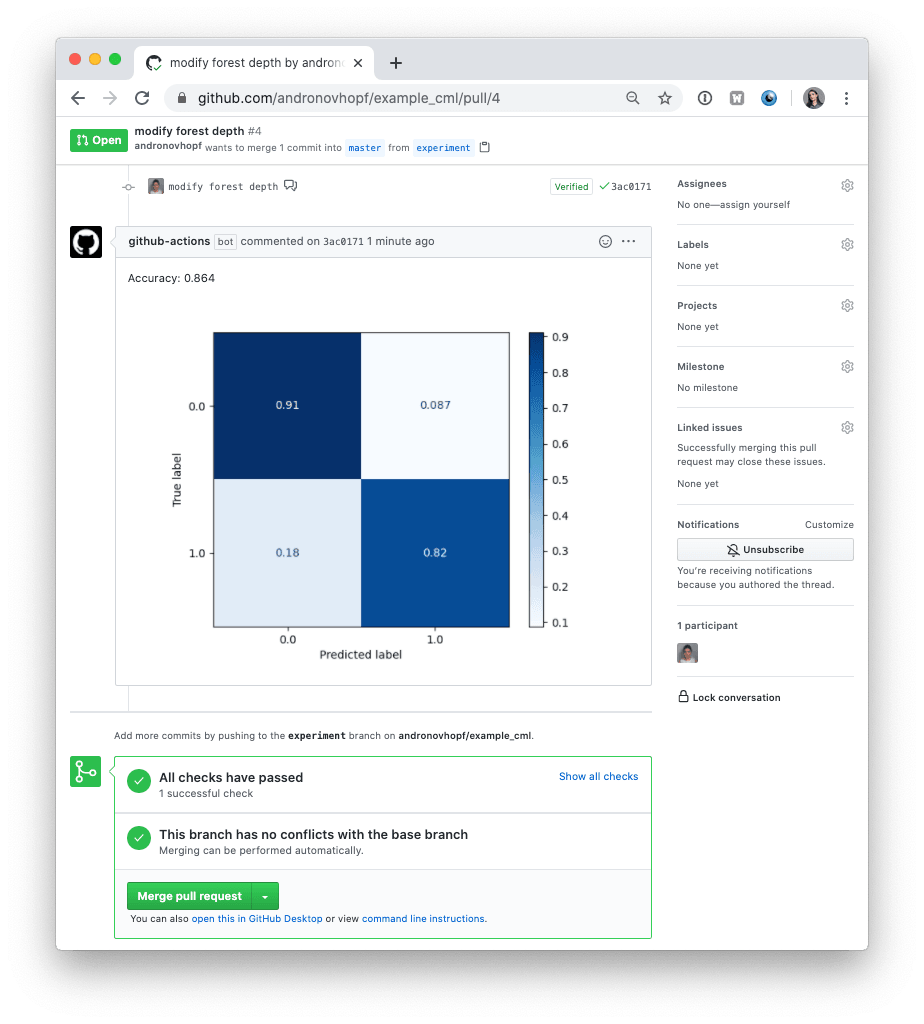
Shortly, you should see a comment appear in the Pull Request with your CML report. This is a result of the
cml comment createcommand in your workflow.
This is the gist of the CML workflow: when you push changes to your GitHub
repository, the workflow in your .github/workflows/cml.yaml file gets run and
a report generated.
CML commands let you display relevant results from the workflow, like model performance metrics and visualizations, in GitHub checks and comments. What kind of workflow you want to run, and want to put in your CML report, is up to you.
Final Solution
An example of what your repository should look like now can be found at
iterative/cml_base_case.
Setup Action
In the above example, we got the CML commands thanks to our Docker container.
But there's another way for GitHub Actions users to get CML: the setup-cml
Action!
The iterative/setup-cml action is a JavaScript workflow that provides CML commands in your GitHub Actions workflow. The action allows users to install CML without using the CML Docker container.
This action gives you:
- Commands like
cml comment createfor publishing data visualization and metrics from your CI workflow as comments in a pull request. cml runner, a command that enables workflows to provision cloud and on-premise computing resources for training models- The freedom 🦅 to mix and match CML with your favorite data science tools and environments
Note that CML does not include DVC and its dependencies — for that, you want the Setup DVC Action.
Usage
This action has been tested on ubuntu-latest and macos-latest.
Basic usage:
steps:
  - uses: iterative/setup-cml@v1
A specific version can be pinned to your workflow.
steps:
  - uses: iterative/setup-cml@v1
    with:
      version: '1.0.1'
Inputs
The following inputs are supported.
version- (optional) The version of CML to install. The default value oflatestwill install the latest version of CML.
Outputs
Setup CML has no outputs.
A complete workflow
Assume that we have a machine learning script, train.py, that outputs an image
plot.png. A potential workflow will look like this:
name: CML
on: [push]
jobs:
train-and-report:
runs-on: ubuntu-latest
steps:
- uses: iterative/setup-cml@v1
- uses: actions/checkout@v3
- name: Train model
env:
REPO_TOKEN: ${{ secrets.GITHUB_TOKEN }}
run: |
pip install -r requirements.txt
python train.py # generate plot.png
echo "# CML report" >> report.md
echo '' >> report.md
cml comment create report.md